smartbiz SUPPORT, FAQ, KNOWLEDGE BASE

Get Answers to
All Your Questions

Need help with your device or app? Whether it’s setting up your router, troubleshooting your phone, or managing our mobile app, we’ve got you covered. Check out quick guides, updates, and how-tos for all your hardware and software needs.

[AnyBSP] SmartBiz Support

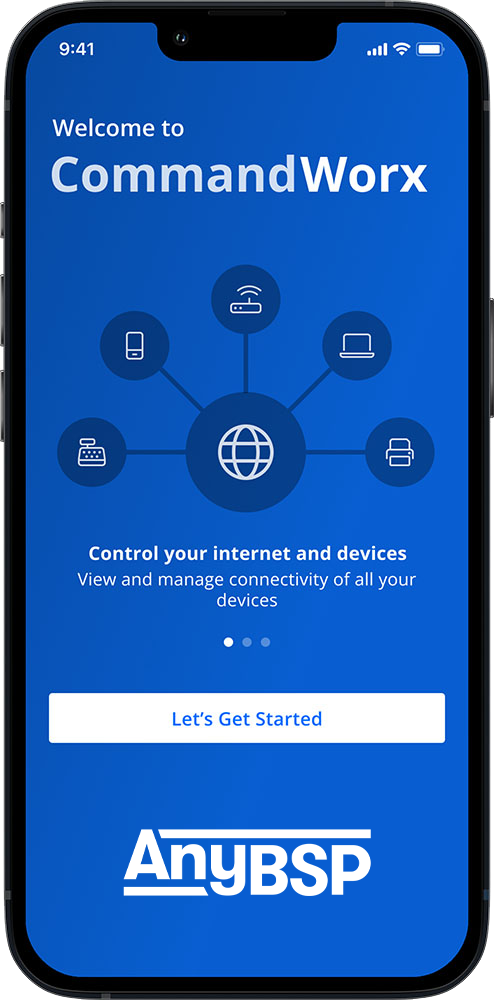
Get help for all of your devices and apps in one place, or connect with us directly.

App Setup  |  Network Setup  |  Additional Network Settings  |  Customer Portal  |  Staff Management  |  Alerts  |  Devices  |  Network Resilience

App Setup

Where can I download the CommandWorx app? 

From the Apple App Store or Google Play Store

What languages does CommandWorx support?

English, French (Canadian), Spanish, and German 

How do I add another admin to CommandWorx app?

Go to Settings, tap Account and Admins, and tap Invite Admin
Enter their name and email address
Tap Send Invite

How do I change or remove the secondary admin in the app?

Go to Settings and tap Account and Admins
Tap the Secondary Admin to view their profile
Tap Delete Person and confirm the deletion

How do I change the Primary user of CommandWorx to a different user?

Reach out to your service provider to request a Primary user change

Network Setup

How do I set up the Primary network?
  • Go to Networks, tap the Primary network, and tap Edit
  •         Enter a Network Name (SSID) and Wi-Fi Password and select a Security Type
  •         Tap Save
  • Tap NetworkSecurity
  •         See How do I set up the Trusted List?
  •         See How do I set up Skipped Devices?
  •         See How do I set up Intrusion Settings?
  • Tap Content Restrictions
  •         See How do I set up Content Restrictions?
How do I set up the Point-of-Sale network?
  • Go to Networks, tap the Point-of-Sale network, and tap Edit
  • Tap to enable Wired and/or Wireless Network Access
  • When Wired Network Access is enabled, both Primary and Point of Sale wired devices will require manual approval when first connected
  • Enter a Network Name (SSID) and Wi-Fi Password and select a Security Type 
  • Tap to enable or disable the following options:
  • Broadcast SSID: allows devices to discover the Wi-Fi network
  • Intra-Isolation: prevents devices on the Point-of-Sale network from connecting to each other. Only enable if all devices connect to the Internet independently and don’t communicate with other devices on the network.
  • Inter-Isolation: prevents devices on the Point-of-Sale network from seeing or being seen by devices on other networks, cannot be disabled
  • Tap Save
  • Tap NetworkSecurity
  • See How do I set up the Trusted List? 
  • See How do I set up Skipped Devices? o   See How do I set up Intrusion Settings? 
  • Tap Content Restrictions
  • See How do I set up Content Restrictions?
How do I set up the Staff network?
  • Go to Networks, tap the Staff network, and tap Edit o
  • Choose the Network Configuration: §
  • Shared Password: all employees connect to the network using the same password, individual Staff profiles are not available ·
  • Enter a Network Name (SSID) and Wi-Fi Password and select a Security Type§
  • Individual Passwords: create individual Staff profiles with unique auto-generated passwords, connected devices are associated with a specific profile 
  • Enter a Network Name (SSID)o
  • Tap Save·
  • Tap NetworkSecurityo
  • See How do I set up the Trusted List?o
  • See How do I set up Skipped Devices? o
  • See How do I set up Intrusion Settings?·
  • Tap Content Restrictionso
  • See How do I set up Content Restrictions?·
  • Tap Network Access Hourso
  • Tap the Network Hours dropdown, and select a schedule: §
  • Always On: network is always available §
  • Every Day: network is available for the same hours every day §
  • Custom: network availability can be customized with a variety of time periods throughout the week o
  • Tap Save
How do I set up the Customer Portal network?
  • Go to Networks, tap the Customer Portal network, and tap the toggle to Enable Customer Portal ·
  • Tap Page Contento
  • Enter a Network Name (SSID)o
  • Enter a Page Headingo
  • Tap Upload and select a Cover Photo o
  • Select the Login Requirements§
  • Email, First Name, Last Name: collect personal information for marketing purposes §
  • None: will not collect personal information o
  • Tap the Anti-spam Content toggle to enable or disable marketing communications opt-in§
  • When enabled, tap the Anti-spam Consent dropdown to select the Anti-spam Consent type§
  • Enter the Anti-spam Consent webpage URL or plain text§
  • Please check if Anti-spam Consent is legally required in your locality o
  • Tap the Terms of Servicedropdown to select the Terms of Service typeo
  • Enter the Terms of Service webpage URL or plain texto
  • Enter Button Texto
  • Tap Save·
  • Tap Brandingo
  • Tap Upload to select a Logo imageo
  • Enter a Background Colorhex code or tap the color block and select a color o
  • Enter a Font Colorhex code or tap the color block and select a color o
  • Enter a Primary Button Colorhex code or tap the color block and select a color o
  • Enter a Button Font Colorhex code or tap the color block and select a color o
  • Tap Save·
  • Tap Network Access Hourso
  • Tap the Network Hours dropdown, and select a schedule: §
  • Always On: network is always available §
  • Every Day: network is available for the same hours every day §
  • Custom: network availability can be customized with a variety of time periods throughout the week o
  • Tap Save·
  • Tap NetworkSecurityo
  • See How do I set up the Trusted List?o
  • See How do I set up Skipped Devices? o
  • See How do I set up Intrusion Settings?·
  • Tap Content Restrictionso
  • See How do I set up Content Restrictions?·
  • Tap Customer Portal Visitorso
  • To adjust the Login Retention period: §
  • Tap Edit§
  • Tap the Login Retention dropdown and select a retention period§
  • Tap Saveo
  • To receive a list of customers who accessed the Customer Portal: §
  • Tap Email Customer List File
How do I set up a Custom network?
  • Go to Networks, tap the + button, and tap Add Network o
  • Enter a Network Name (SSID) and Wi-Fi Passwordo
  • Select the broadcasting WiFi Bands and a Security Typeo
  • Tap to enable or disable the following options: §
  • Broadcast SSID: allows devices to discover the Wi-Fi network §
  • Intra-Isolation: prevents devices on the Custom network from connecting to each other. Only enable if all devices connect to the Internet independently and don’t communicate with other devices on the network. §
  • Inter-Isolation: prevents devices on the Custom network from seeing or being seen by devices on other networks, cannot be disabled o
  • Tap Save
What does the Security Type (WPA) setting mean?
  • WPA (Wi-Fi Protected Access) is an encryption protocol for Wi-Fi network security ·
  • It is recommended to use the most recent version of WPA that is supported by connected deviceso
  • WPA2 was ratified in 2004 and will be supported by nearly all devices o
  • WPA3 was ratified in 2018 and will be supported by modern devices
How do I edit a Network Name (SSID) or Wi-Fi Password?
  • Go to Networks, tap the Network you want to modify, and tap Edit ·
  • Change the Network Name and/or Wi-Fi Password·
  • Tap Save

Additional Network Settings

How do I set up Content Restrictions?
  • Tap the toggle of the following restrictions to enable or disable: o
  • Safe Search: filters out potentially offensive and inappropriate search results o
  • YouTube Restrictions: filters out potentially mature and inappropriate video content o
  • Block DNS over HTTPS: prevents resolving encrypted DNS requests §
  • Does not prevent encrypted website traffic (e.g., https://abc.xyz) o
  • Block iCloud Private Relay: prevents routing web traffic through Apple’s iCloud service ·
  • Tap Content Restrictionso
  • Tap the dropdown menu to select a preset grouping of content categories o
  • Alternatively, tap the toggle of individual categories to enable restricting that type of content ·
  • Tap Applicationso
  • Search for specific mobile applicationso
  • Tap the mobile application to set restrictions §
  • Block: total restriction §
  • Always allow: no restriction §
  • Allow for: restricted after a set amount of usage o
  • Tap the X to remove the mobile application restriction·
  • Tap Websiteso
  • Enter a website URL and tap the + button to set restrictions o
  • Tap Block or Always Allowo
  • Tap the X to remove the website restriction
What is the Trusted List?
  • A list of website URLs that have been designated as trusted and will not be monitored for cyberthreats ·
  • You should only add URLs to the Trusted List when you are confident that they are safe
How do I set up the Trusted List?
  • Tap Trusted Websites o
  • To add a website, tap the + button, enter the website URL, and tap Saveo
  • Website URLs in the Trusted List will not be monitored for cyberthreats o
  • You should only add URLs when you are confident that they are safe
What is the Skip Devices feature?
  • Selecting a Device bypasses Network Security by disabling packet inspection of its network traffic ·
  • Skipped Devices will not trigger any
How do I set up Skipped Devices? 
  • Tap Skipped Devices ·
  • To select or deselect a Device, tap the checkbox next to a Device
What are Intrusion Settings?
  •  The Intrusion Prevent System provides options that enhance cybersecurity monitoring and protection
How do I set up Intrusion Settings?
  • Tap Intrusion Settings ·
  • Tap the checkbox of the following Intrusion Settings: o
  • IPS Protocol Anomaly : monitors your network activity for known behavior that could be indicative of a cyberattacko
  • IPS Port-Scan-Defense: detects and blocks malicious actors scanning your system for open network ports
  • Tap Save
What information is available in Additional Details?
  • Total viruses detected ·
  • Total intrusions ·
  • Total web threats ·
  • Network Security uptime ·
  • Packets analyzed today ·
  • Last updated date/time

Customer Portal

What are the Customer Portal Terms of Service for?
  • Creating a Terms of Service helps protect your business from legal liability by outlining acceptable and unacceptable use of your Wi-Fi ·
  • Customers will be required to accept your Terms of Service
What is the Retention Period in the Customer Portal?
  • The period of time that a user can connect to the Customer Portal without re-entering their information

Staff Management

How do I add or remove a Staff profile from the Staff network?
  • Add a Profile o
  • Go to Staff and tap the + button o
  • Enter the employee’s name and email address o
  • Select a Device Registration type §
  • High Trust: employee can connect any device §
  • High Control: devices require approval through CommandWorx, limited to 3 devices ·
  • Delete a Profileo
  • Go to Staff, tap a Staff Profile, and tap Edito
  • Tap Delete Staff and confirm deletion
How do I pause Internet access for a Device or Staff member?
  • Go to Devices or Staff, tap a Device or Staff profile ·
  • Tap the Internet Access toggle to disable or enable access

Alerts

What information will I see in Alerts?
  • CommandWorx offers a variety of Alerts relating to: o
  • Client and mesh device connectivity o
  • Internet service connectivity o
  • Content restrictions o
  • Network security ·
  • Each Alert includes a short description and the date/time it was triggered ·
  • Different Alerts provide additional relevant information, such as: o
  • IP address and name of the Device o
  • Website domain or URL that triggered the Alert o
  • Action taken against the cyberthreat o
  • Staff member’s name o
  • Content category o
  • And more
How do I customize my Alerts?
  • Go to Settings and tap Alerts ·
  • Tap the Push Notifications toggle to enable or disable Alerts ·
  • Tap an Alert’s toggle to enable or disable that Alert
What happens when I get a Security Alert? Should I be worried?
  • You will receive a Security Alert when SmartBiz has automatically blocked a cybersecurity threat ·
  • You do not need to take any immediate action, but it’s recommended that you use the information in the Alert to investigate what triggered the threat and take any further action to prevent another occurrence
My device appears to be working normally, but I keep seeing a Security Alert. What do I do?
  • Review the details of the Security Alert to better understand what is triggering the Alert ·
  • If you trust the website that is triggering the Alert, you can tap Add to Trusted List to stop scanning traffic from that URL ·
  • If you are concerned about the website or associated device, it’s recommended that you disconnect or power off the device and seek additional help

Devices

What details can I see about a Device on my network?
  • Device Type ·
  • Gateway/Mesh it’s connected to ·
  • Download and Upload speed from most recent Bandwidth Test ·
  • Wi-Fi protocol, Band, Channel, and Efficiency/Quality ·
  • IP Address ·
  • Vendor (Manufacturer) ·
  • Model
How do I add a new Device?
  • Go to Devices and tap the + button ·
  • Devices can be added by entering the Network’s Wi-Fi credentials on the Device or using WPS·
  • To add via Wi-Fi credentials: o
  • Tap the dropdown and select which Network you want to add the Device to o
  • Connect the Device using the Network Name (SSID) and Password (Devices page): o
  • Tap the dropdown and select which Network you want to add the Device to o
  • Tap the Connect button to enable WPS for 2 minutes o
  • Press the WPS button on the Device you want to add to the selected Network ·
  • To add via WPS (Point of Sale Network) o
  • Go to Networks and tap the Point of Sale network o
  • Tap the Connect Device via WPS button to enable WPS for 2 minutes o
  • Press the WPS button on the Device you want to add to the Point of Sale network
How do I approve a wired Device on my Primary or Point of Sale network?
  • Go to Devices and tap the unapproved Device ·
  • Tap Approve Device and tap Okay·
  • If the approval was successful, it’s recommended to unplug and reinsert the Device’s Ethernet cable to ensure it’s working properly ·
  • If the approval was unsuccessful, tap Approve Device again or unplug the Device’s Ethernet cable for a few minutes and plug it back in to trigger another approval request
How do I rename a Device?
  • Go to Devices, tap the Device, and tap Edit ·
  • Enter a new Name and tap Save
How do I view how Devices are connected and mapped in my network?
  • Go to Networks and tap Network Map under Shortcuts
How do I reboot my gateway or mesh satellite?
  • Go to Networks and tap the Equipment tab ·
  • Tap the Gateway or Mesh Satellite device ·
  • Tap Reboot and tap Yes, Reboot to initiate rebooting the device

Network Resilience

What is Network Resilience?
  • Network Resilience enables support for a secondary Internet connection that can be used if there is an unexpected and extended outage of the primary connection ·
  • A secondary device is required, most commonly a cellular hotspot or smartphone·
  • Network Resilience will detect when the primary connection stops responding and automatically switch to the secondary connection in approximately 90 seconds ·
  • When the primary connection is restored, Network Resilience will automatically switch back in approximately 90 seconds
What devices can be used for Network Resilience?
  • Any device that offers a Wi-Fi connection, such as a cellular hotspot, a smartphone with hotspot support, or a nearby Wi-Fi router with a separate Internet connection ·
  • SmartBiz also supports a wired secondary connection, reach out to your service provider to learn if this is an option for you
How do I change my Network Resilience back-up device?
  • Go to Networks, tap on Network Resilience, tap on Select a Different Failover Device ·
  • Tap a different Failover Device SSID, input its Wi-Fi credentials, and tap Connect to Hotspot